Sharing
In this part of the tutorial we look at taking an existing model, having a play with it, and sharing it with our colleagues. You need to make sure you have completed the preparation before embarking on the following.
The Hill 3-element model with parallel damping
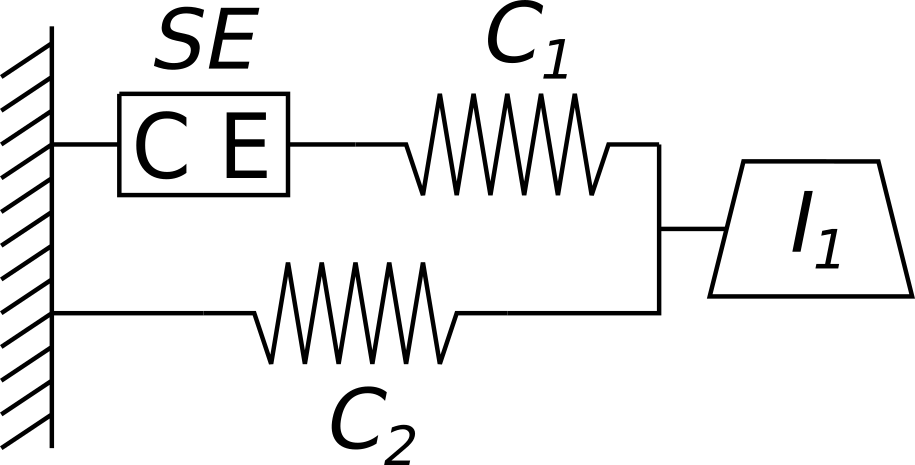
Fig. 1 Schematic illustration of the initial 3-element Hill model.
For this tutorial we are working with various configurations of the fundamental Hill mechanics model, starting with the basic 3-element model shown in Fig. 1 we have developed a Hill model with parallel damping, as shown in Fig. 2. The bond graph form of the model is shown in Fig. 3. We have prepared a starting point workspace for you to begin with. In your browser, head over to http://teaching.physiomeproject.org/workspace/2b4 and fork the workspace. This will create your own private copy of the workspace to use. Instructions for how to actually accomplish this are given at: Forking an existing workspace.
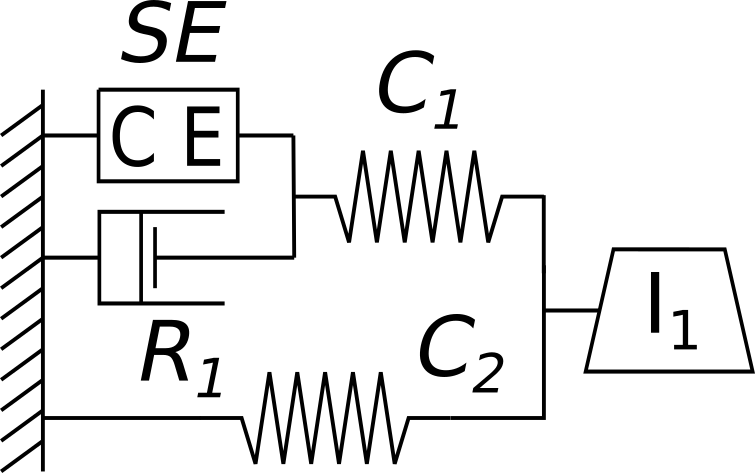
Fig. 2 Schematic illustration of the Hill model with parallel damping we are using in this part of the tutorial. The model is located in the Hill_Basic_pDash.cellml.
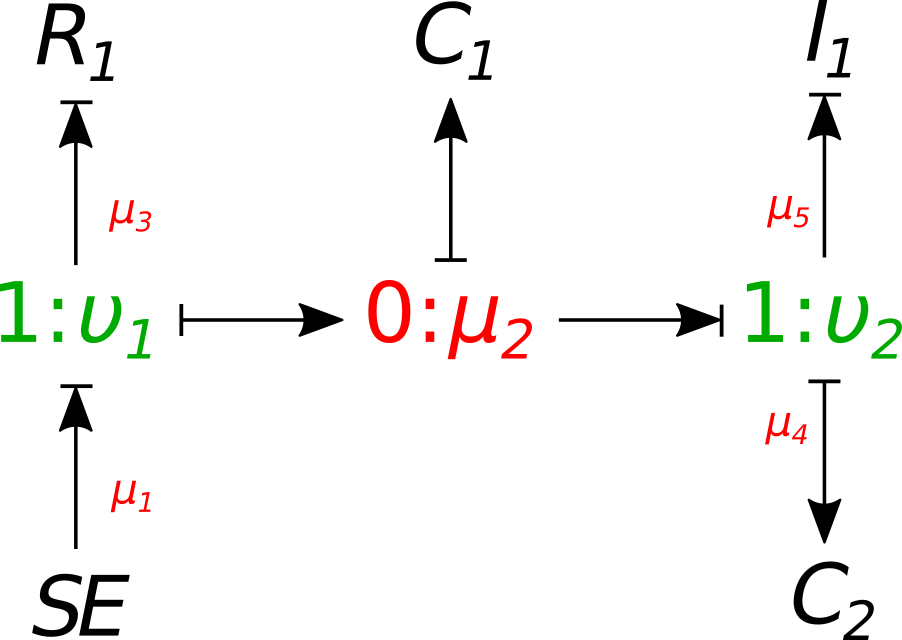
Fig. 3 The bond-graph representation underlying the Hill model.
If you now reload your workspaces in the PMR Workspaces panel in OpenCOR, you should see your newly created fork of the Hill model workspace. Following the same instructions as given in Using PMR with OpenCOR, you should now make a local copy of this workspace. If you load the CellML model Hill_Basic_pDash.cellml you can explore the mathematics of this model in the CellML Text view in the Editing window. You can also switch to the Simulation window and try out running some simulations and creating plots of the results. Further assistance for running simulations is available here: Create and run a simple CellML model: editing and simulation.
Sharing simulation descriptions
Once you have explored the model mathematics and played with simulations, you can then load the file Hill_Basic_pDash.sedml into OpenCOR by double-clicking it. This is a SED-ML document.
Note
SED-ML is a standard for encoding descriptions of simulation experiments. OpenCOR makes use of SED-ML to serialise the various settings for simulations to be executed and graphs to be drawn, so that users are able to archive such information as well as share it.
Once the SED-ML file is loaded, you should be able to execute the simulation experiment and hopefully get something that looks similar to Fig. 4. Since the SED-ML is directly referencing the CellML model you have been exploring above, exactly how close it matches will depend on how much you changed the Hill_Basic_pDash.cellml CellML model.
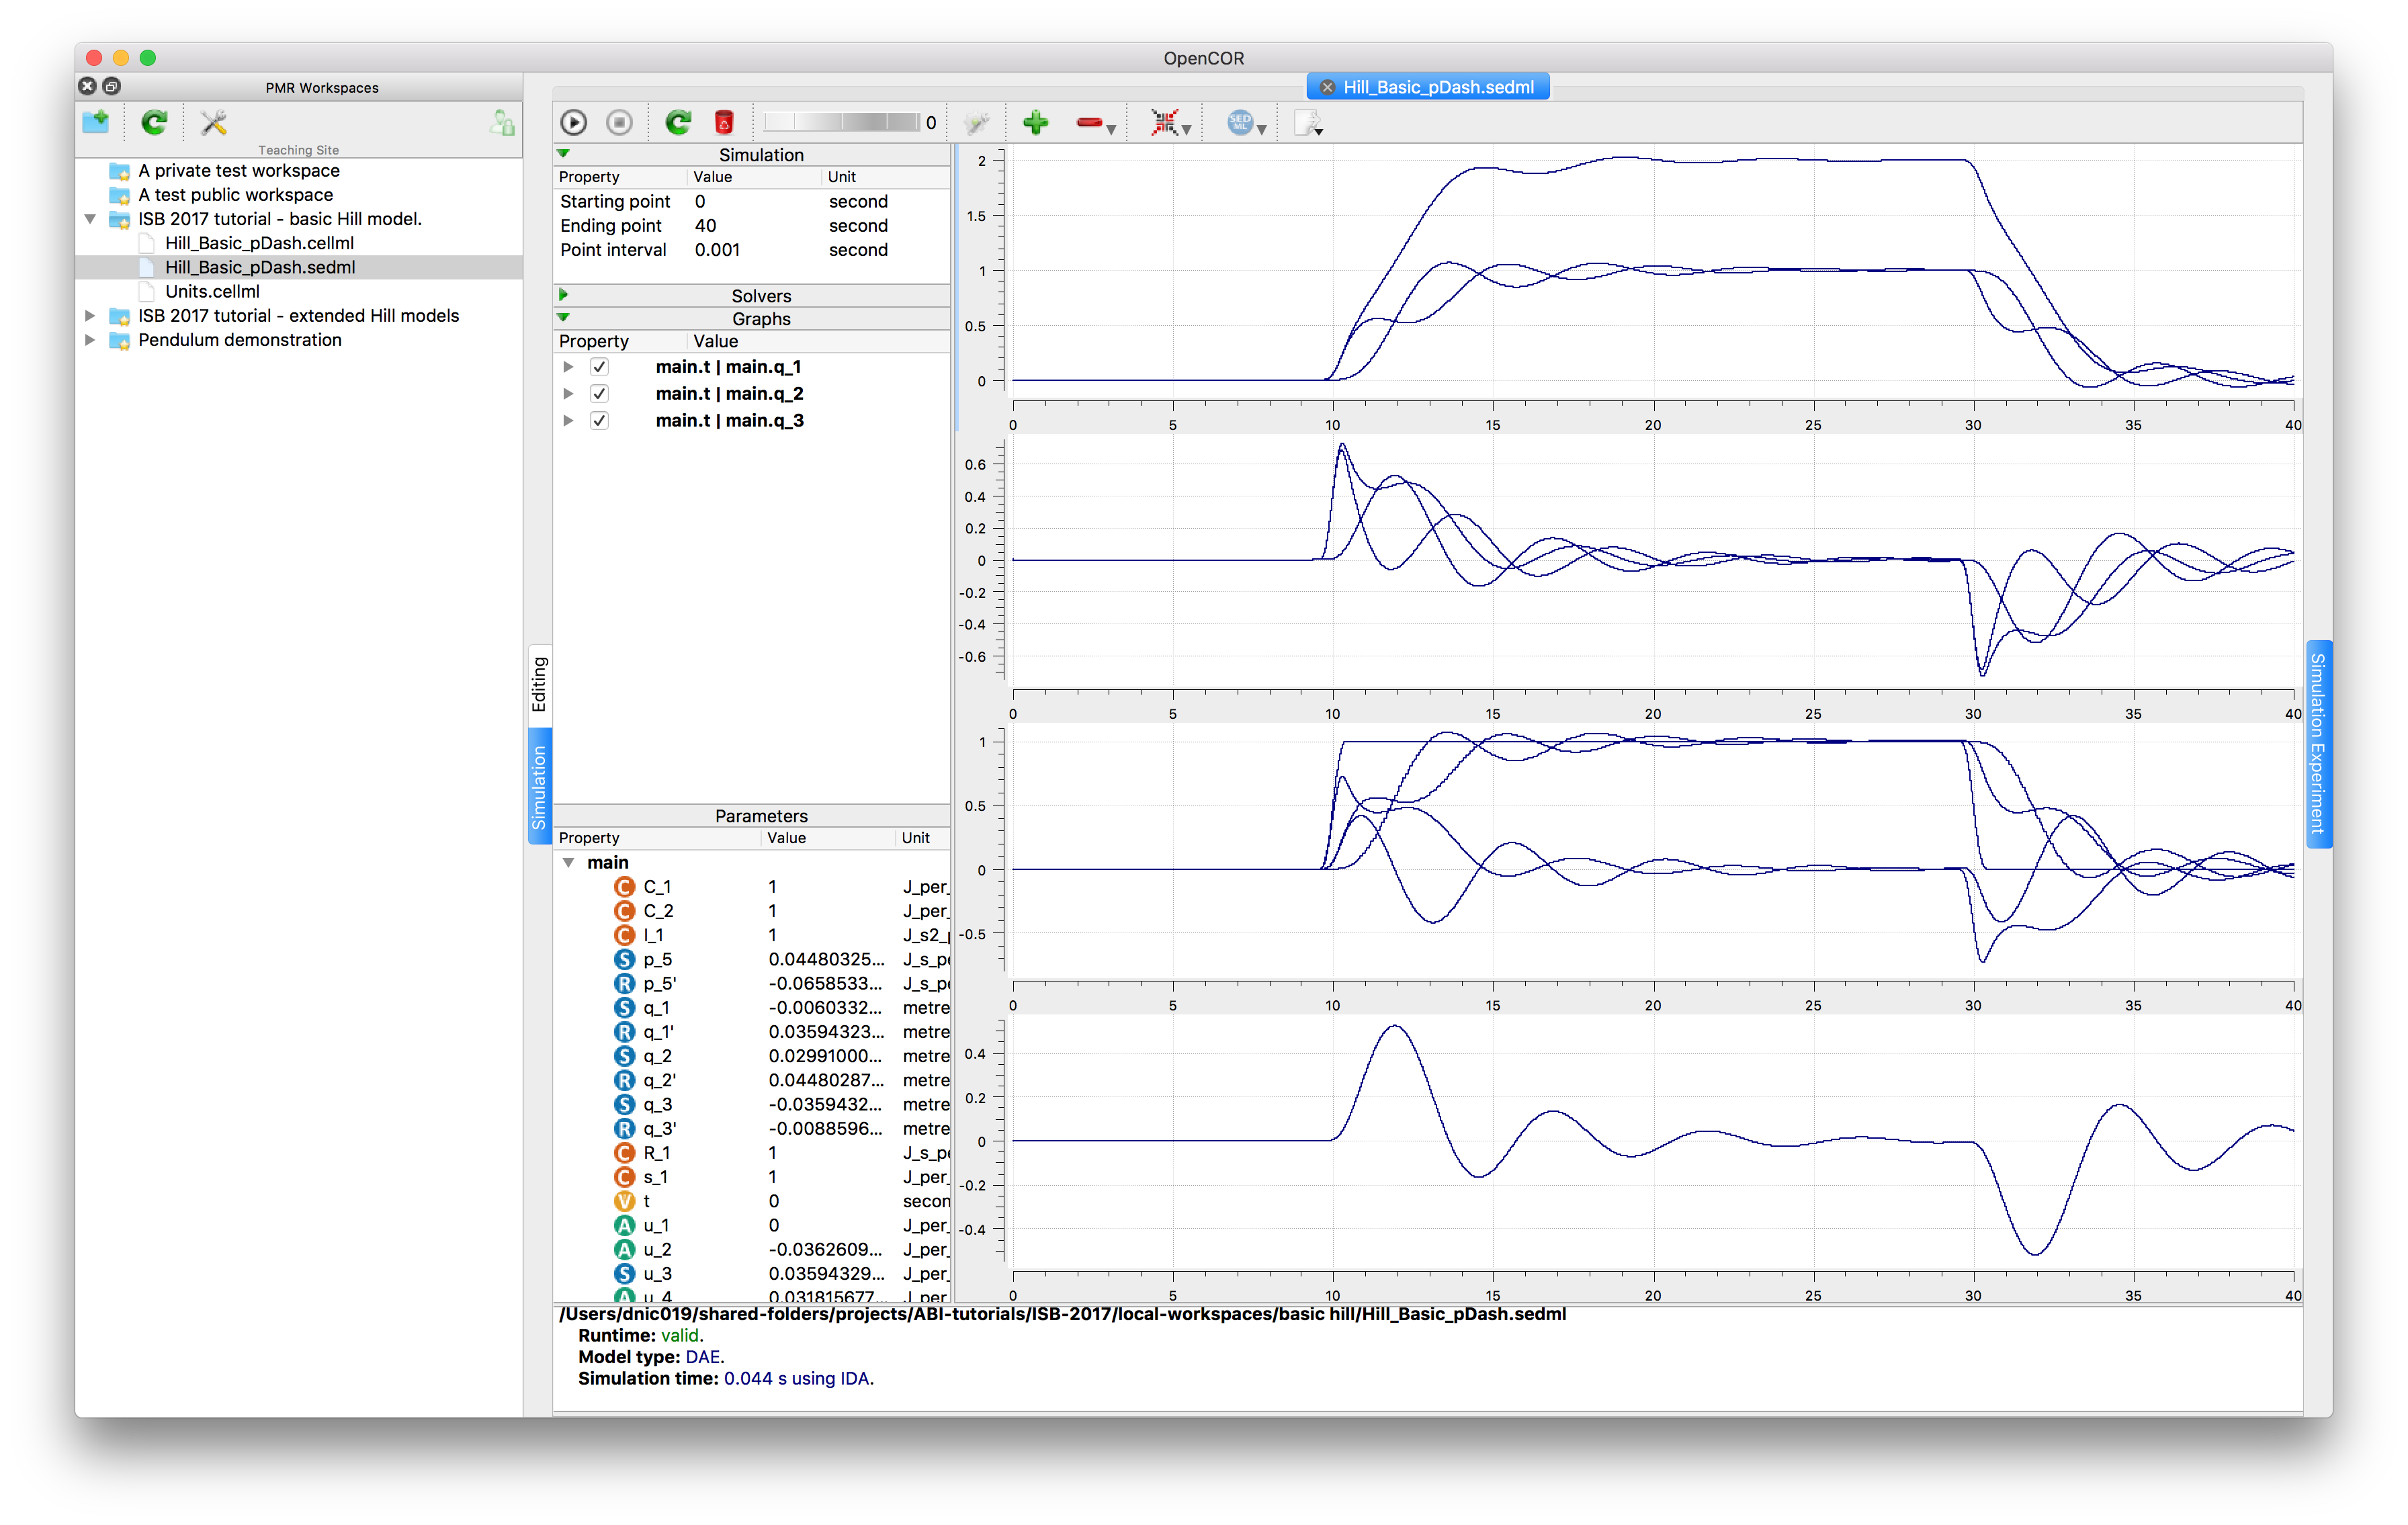
Fig. 4 The results from executing the simulation experiment described in Hill_Basic_pDash.sedml.
If you are wondering what changes you might have introduced to the model you can make use of the PMR Workspaces widget to check for differences. If there are any differences, you should see little icon decorations in the file listing for this workspace and the menu option under the context-menu (right-click) should be available. If you then choose the you will be presented with a graphical summary of the changes that have been made.
This illustrates how CellML and SED-ML can be used to archive and share a reproducible description of the model and simulation experiment.
Sharing your customisations
To further demonstrate the sharing capabilities, go back to the Hill_Basic_pDash.cellml CellML model and using both the model editing and simulation capabilities of OpenCOR see if you can come up with an interesting simulation experiment to share with your neighbour. Starting in the Hill_Basic_pDash.cellml window:
- Iterate between the Editing and Simulation views to try and obtain some interesting plots or results.
- See Create and run a simple CellML model: editing and simulation for a reminder of how OpenCOR functions.
- Once you have something to share, see Fig. 51 for how to export a new SED-ML document. Be sure to save this document in the same folder where you made the local copy of the workspace.
- Now synchronise your workspace with PMR.
- Discover your neighbour's PMR user name.
- Share your workspace with your neighbour using the directions given here: Working with collaborators.
- When your neighbour shares a workspace with you, you'll need to fork the workspace under your own account in order to access it using OpenCOR (as described above). Then you should be able to make a local copy of the workspace using OpenCOR and hopefully reproduce exactly the same results as your neighbour.
- If desired, you can also submit your workspace for publication as described under Working with collaborators, the tutors can then take a look at your work and also hopefully reproduce the results.